Personalizing Your Storefront

When a client opens your storefront, it should feel like walking into your shop: your name on the door, your colors on the walls, and the products you'd hand them yourself. You don't need a designer to get there, and you can do it all from your portal.
There are two places to work from. Store profile is home to your logo, website and social links, and Store designer is where your homepage comes together: your banner, your color, and the things you'd like clients to see first. Once it feels like you, you can switch your store to Live whenever you're ready. Log in to start designing your storefront.
Your name at the top tells clients the list is yours
Clients usually reach your storefront from a link you sent: a text after an appointment, your booking confirmation, your Instagram bio. In the first few seconds they're checking one thing: is this really from you? Your logo, your photo and your words answer that before they scroll.
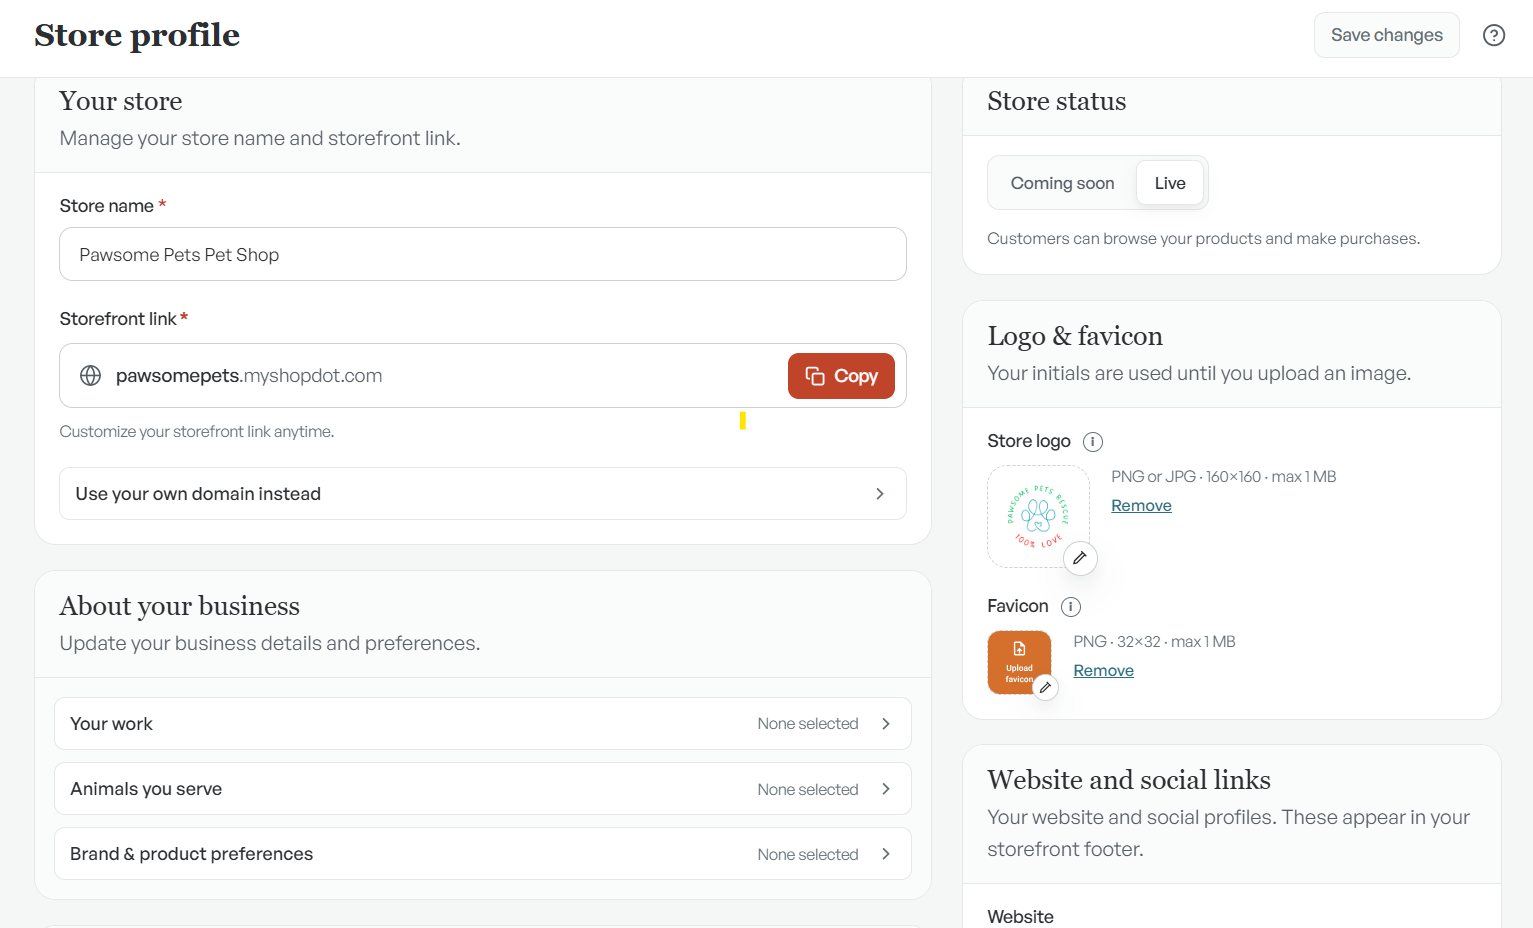
Add your logo in Store profile
Open Store profile. Under Logo & favicon, upload your store logo (PNG or JPG, 160 × 160 pixels, up to 1 MB) and a favicon, the small icon in the browser tab (PNG, 32 × 32 pixels). Until you upload a logo, your store shows your initials. Use the same logo as your website or business cards so everything matches.
While you're there, check your Store name and Storefront link, and add your website and social profiles under Website and social links. They appear in your storefront footer, so clients can find you everywhere else too.
Set your homepage banner
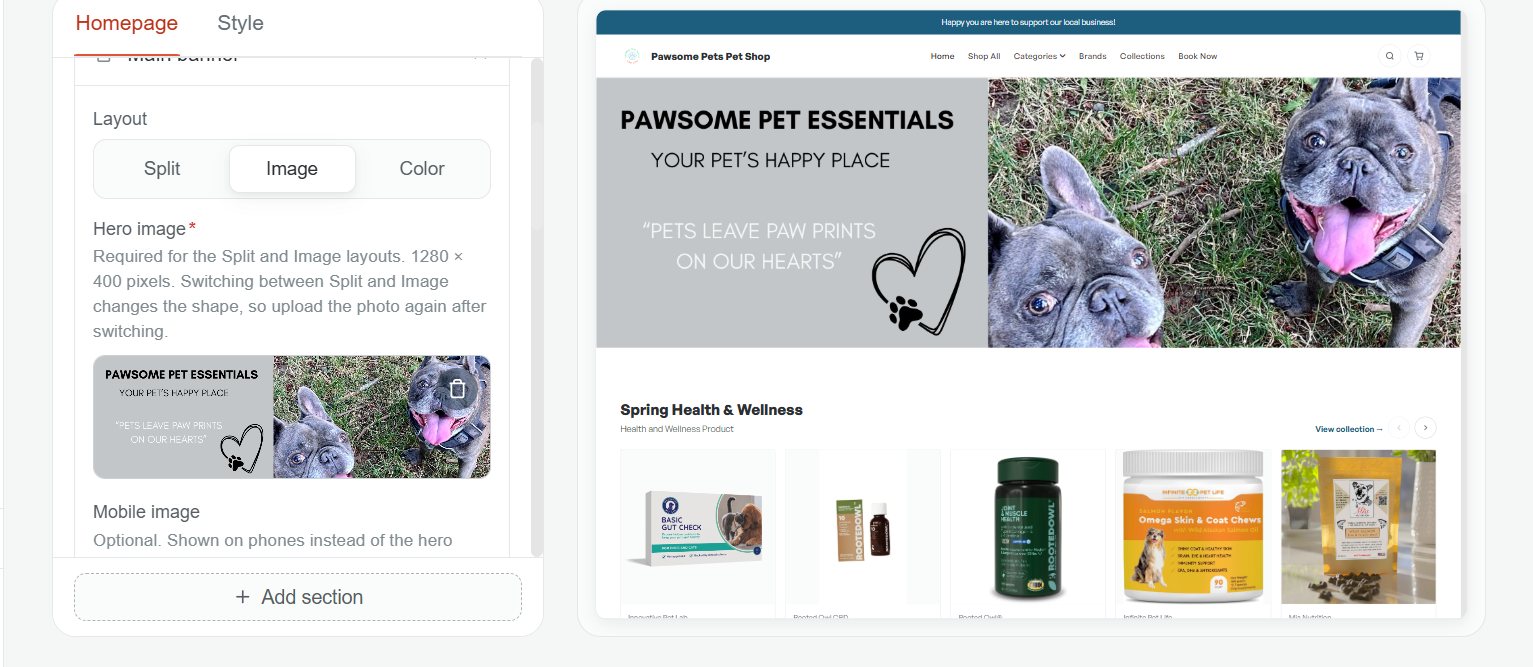
Open Store designer. On the Homepage tab, open Main banner and choose a layout:
- Split: your photo on one side, your text on the other
- Image: your photo across the full banner
- Color: a solid block in your brand color
Split and Image need a hero image at 1280 × 400 pixels. Switching between those two changes the banner's shape, so upload the photo again after you switch. You can also add a Mobile image, which phones show in place of the hero.
A real photo of your shop, your team or a client's pet (with their permission) tells clients more than a stock photo. Put your name and what you offer in the banner text.
Pick your color
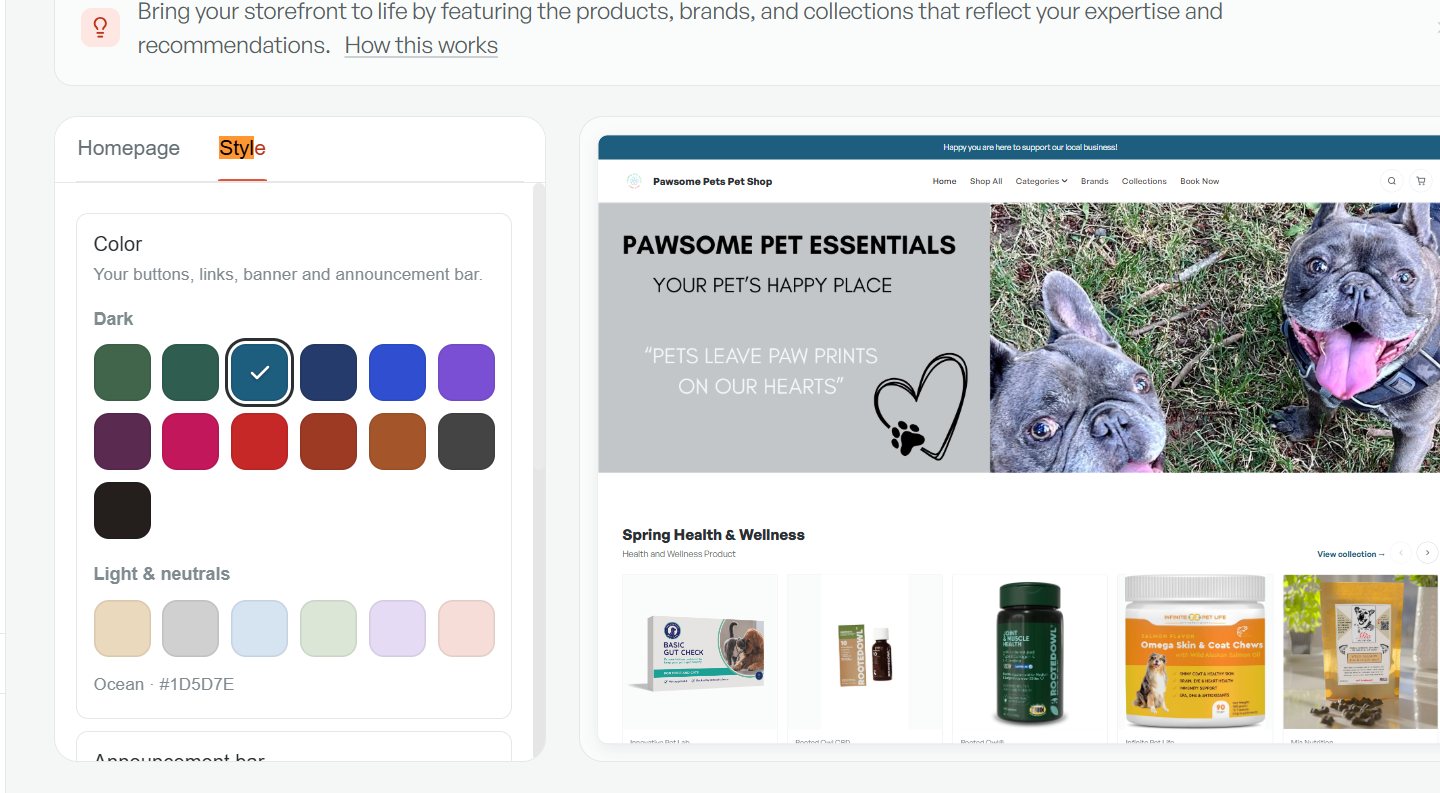
Open the Style tab. Your color sets your buttons, links, banner and announcement bar. Choose from the dark shades or the light and neutral ones, and each change shows in the preview right away. Pick the shade closest to your logo.
The announcement bar settings sit under Color. The bar is the thin strip across the top of your store, a good spot for a short welcome or a seasonal note.
Choose what clients see first
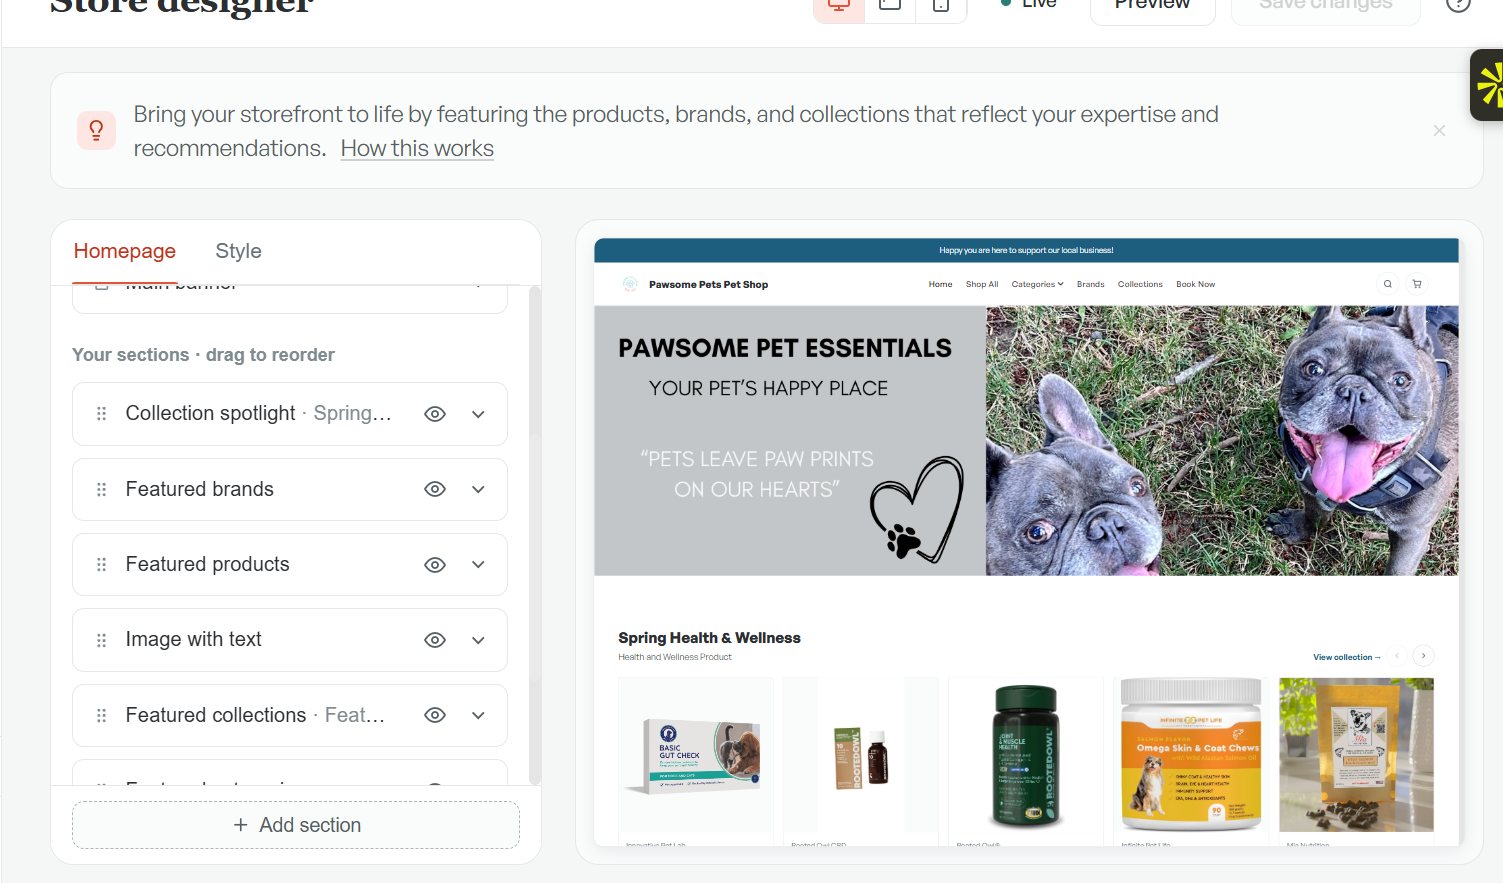
Back on the Homepage tab, Your sections lists everything on your homepage under the banner. Drag to reorder, and use the eye icon to show or hide a section.
- Collection spotlight shows the products inside one collection
- Featured collections shows your collection cards
- Featured brands and Featured products show the brands and products you pick
- Image with text fits a photo and a few lines about you: who you are, which pets you work with, and why you recommend these products
To add more, select Add section. Put what you recommend most at the top, and change it with the seasons. When you're done, select Save changes.
Check it, then go live
Use the preview buttons at the top of Store designer to see your store on a computer, a tablet and a phone. Most clients open your link on a phone, so check that view closely.
When it looks right, go to Store profile and switch Store status from Coming soon to Live. Once it's live, clients can browse your products and buy.
FAQ
Do I need a designer?
No. Store designer works with your logo and your own photos, and you see each change in the preview before you save.
What size should my banner photo be?
1280 × 400 pixels for the Split and Image layouts. Add a separate mobile image if your photo gets cropped on phones.
Can clients see my store while I'm setting it up?
No. While Store status is set to Coming soon, anyone who opens your link sees a Coming soon page. Switch it to Live in Store profile when you're ready.
Can I use my own domain?
Yes. Your store starts with a myshopdot.com link, and in Store profile you can customize that link or select Use your own domain instead.
Your storefront, in your colors
Log in, open Store designer, and start with your banner. For the bigger picture, here's how pet pros earn from the products they recommend.
Log in to personalize your store